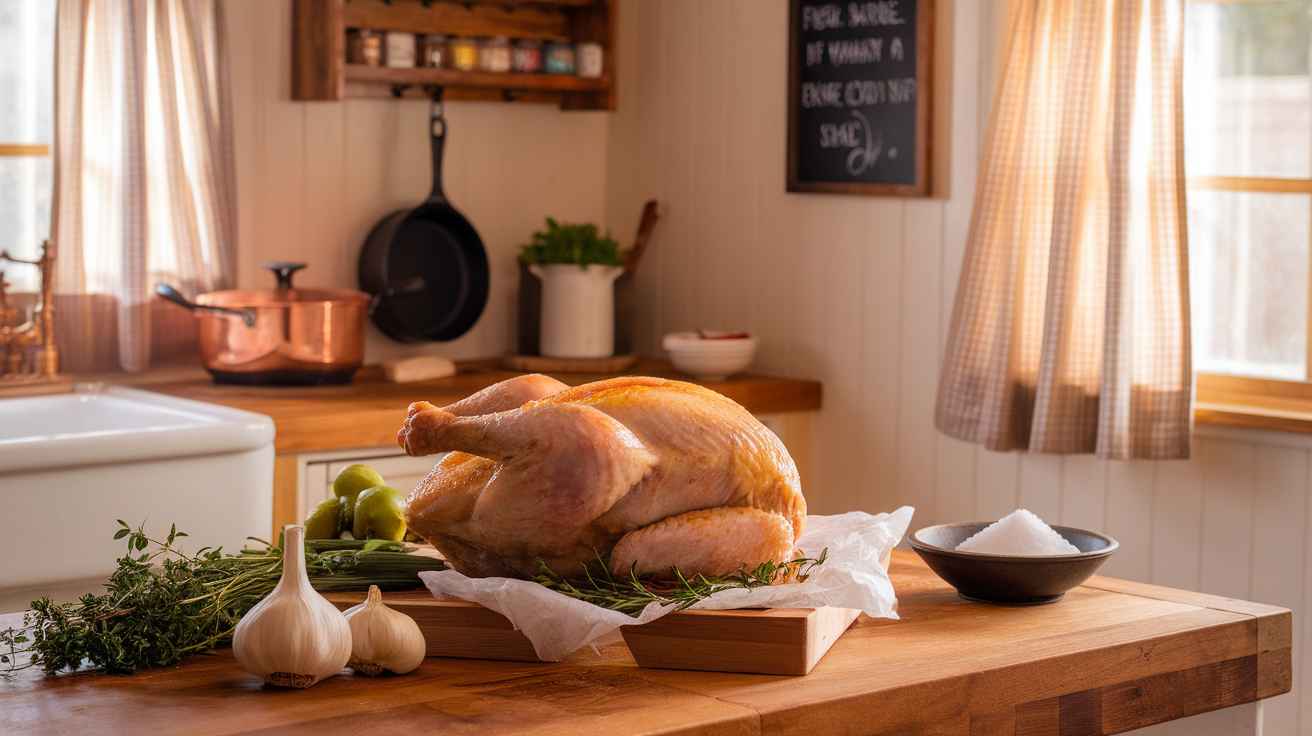

But I wanna tell you something: nothing can ever compare to the whiff of chicken and gravy in a Southern kitchen on a Sunday afternoon. I’ve been chasing this perfect recipe my whole life, and frankly, most of them out there just don’t do the trick. They’re too fancy, maybe too comical, or lacking the very touch that somehow all our grandmothers managed to put in their cast iron skillets.
You understand me, don t you? That nice crunchy golden fried chicken, which almost just falls off your bone with that gravy so rich and tasty that you will wander to tears of joy. All right, here is your apron–now down to business–I am going to give some secrets that have cost me years to perfect.
The Foundation: Choosing Your Bird
Quality Matters More Than You Think
That is the thing about Southern cooking you got to respect what you are working with. I would buy whatever type of chicken was on offer and I believed that it did not really matter. Boy, was I mistaken! 🙂
The difference is in fresh, free-range chicken. You want birds that led a nice life, and not those miserable factory raised ones which taste like cardboard. And take this advice on something really, really good, your taste buds will be grateful later.
| Chicken Type | Flavor Impact | Price Range |
|---|---|---|
| Free-range | Excellent | Higher |
| Conventional | Good | Budget-friendly |
When selecting your chicken, look for these key indicators:
- Firm, plump meat that springs back when touched
- Clear, bright eyes (if buying whole)
- Fresh, clean smell without any funky odors
- Skin that’s not slimy or discolored

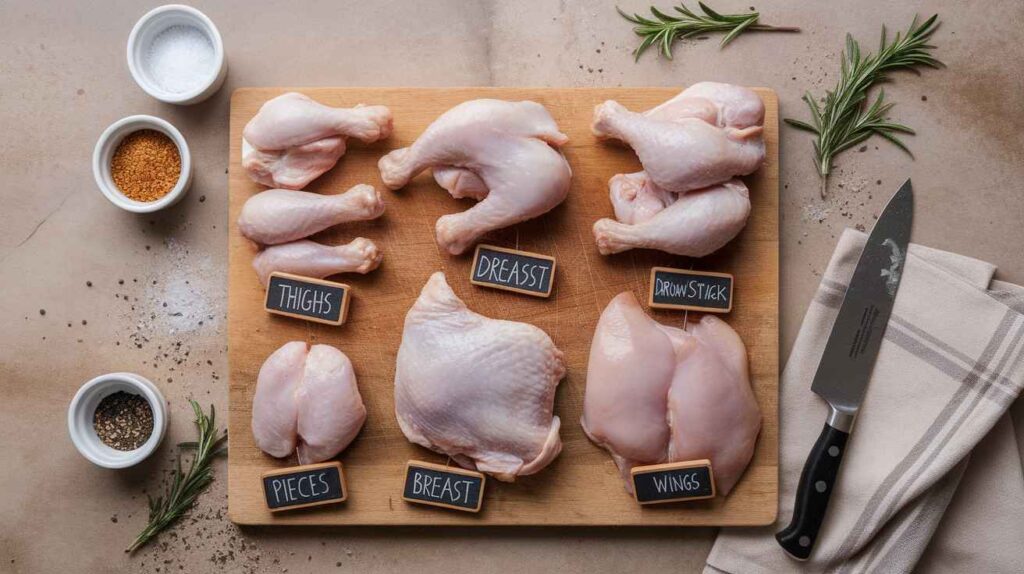
The Cut Decision
It is this point, people so get all distorted. Do you carve up a whole chicken or pieces? I think you will end up with more control over cooking time and more delicious gravy when you buy cut-up chicken pieces. Then besides, how can you feel like you have time to wrestle with an entire bird and you are hungry?
I typically go with:
- Thighs and drumsticks for maximum flavor
- Breast pieces for those who prefer white meat
- Wings because they add incredible richness to the gravy
The Secret Weapon: Proper Seasoning
Beyond Salt and Pepper
Look, you spice chicken with just pepper and salt, and we must sit down and seriously talk. Southern grandmothers did not invent iconic food by being safe!
The magic blend I swear by includes:
- Paprika for that gorgeous color and smoky depth
- Garlic powder (not garlic salt—that’s cheating)
- Onion powder for savory complexity
- Cayenne pepper just a pinch for warmth
- Black pepper freshly cracked, always
- Salt but use it wisely
The Overnight Game-Changer
Have you ever needed to know why restaurant chicken is just so good compared to yours? They marinade it a long time in advance. When I say letting these flavors soak into the meat overnight it means putting these things in the refrigerator.
Combine your mix of spice with some buttermilk (another Southern secret) and leave that chicken to marinate. The proteins are tenderized using the acids contained in the buttermilk since everything is made tender and the spices also get to do their thing in the meat.
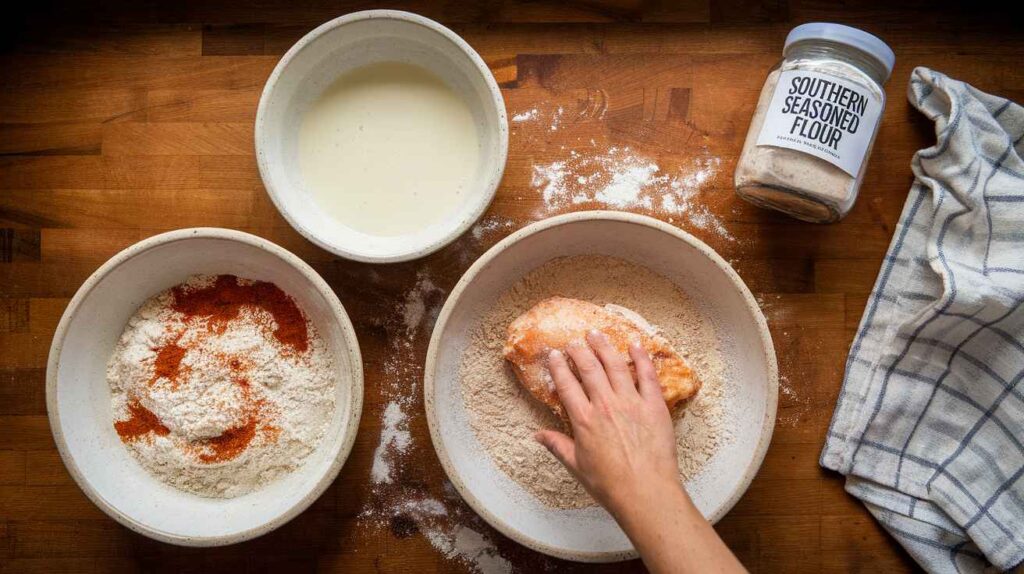
The Art of the Perfect Dredge
Flour Power
This is where people are going wrong most of the time they believe that getting any old flour will do. Your friend here is the Southern all-purpose flour but the only trick lies with its preparation.
The double-dredge method:
- First coat: Seasoned flour mixture
- Wet dip: Buttermilk or beaten eggs
- Second coat: Back into that seasoned flour
This leaves it with the layers of taste and the typical crispy coating that does not get detached when you bite it.
The Seasoned Flour Formula
Don’t just dump flour in a bowl and call it good. Your flour needs to be seasoned properly:
- 2 cups all-purpose flour
- 1 tablespoon paprika
- 2 teaspoons garlic powder
- 2 teaspoons onion powder
- 1 teaspoon cayenne pepper
- 2 teaspoons black pepper
- 1 tablespoon salt
Combine this and keep it in a closed tightly flask. You are going to thank me when you are preparing chicken at 2 AM due to the fact that your mind cannot stop doing so.
Temperature Control: The Make-or-Break Factor
Oil Selection and Heat Management
FYI, this is where the majority of home cooks lose the proverbial plot. Simply put oil into a pan and wish you luck- that is not going to work, temperature control is the scene of the action.
The best oils for frying:
- Peanut oil (my personal favorite for flavor)
- Vegetable oil (budget-friendly and neutral)
- Canola oil (light flavor, good heat tolerance)
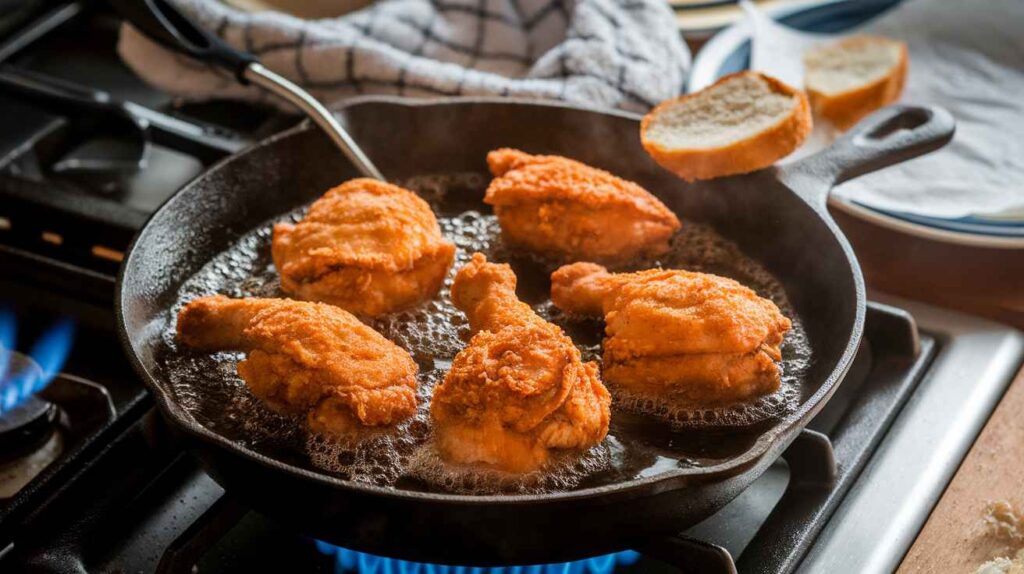
Warm your oil to 325 350 o F. Turn it up a notch and you will burn the coating, before the chicken is cooked. Any freezer and you have sloppy greasy mess.
The Thermometer Test
No fancy thermometer? Throw in a bit of bread into oil. When it sizzles instantaneously and turns golden within a minute and a half, then you are in the sweet spot.
The Cooking Process: Patience Pays Off
Timing is Everything
The dark meat should be eaten before the white meat. Thighs and drumsticks should be started earlier and therefore put them in first before the breasts. This is not rocket science but the fact that so many people get this wrong is incredible.
Cooking times:
- Thighs: 12-15 minutes per side
- Drumsticks: 10-12 minutes per side
- Breasts: 8-10 minutes per side
- Wings: 6-8 minutes per side
The Flip Strategy
This is what your grandma probably did not tell you-just a yellow flip. I realize it is so easy to continue playing with it but each time you flip it you put that beautiful coating in jeopardy.
Watch for these signs it’s ready to flip:
- Golden brown edges starting to form
- Coating looks set and crispy
- Oil stops bubbling frantically around the edges
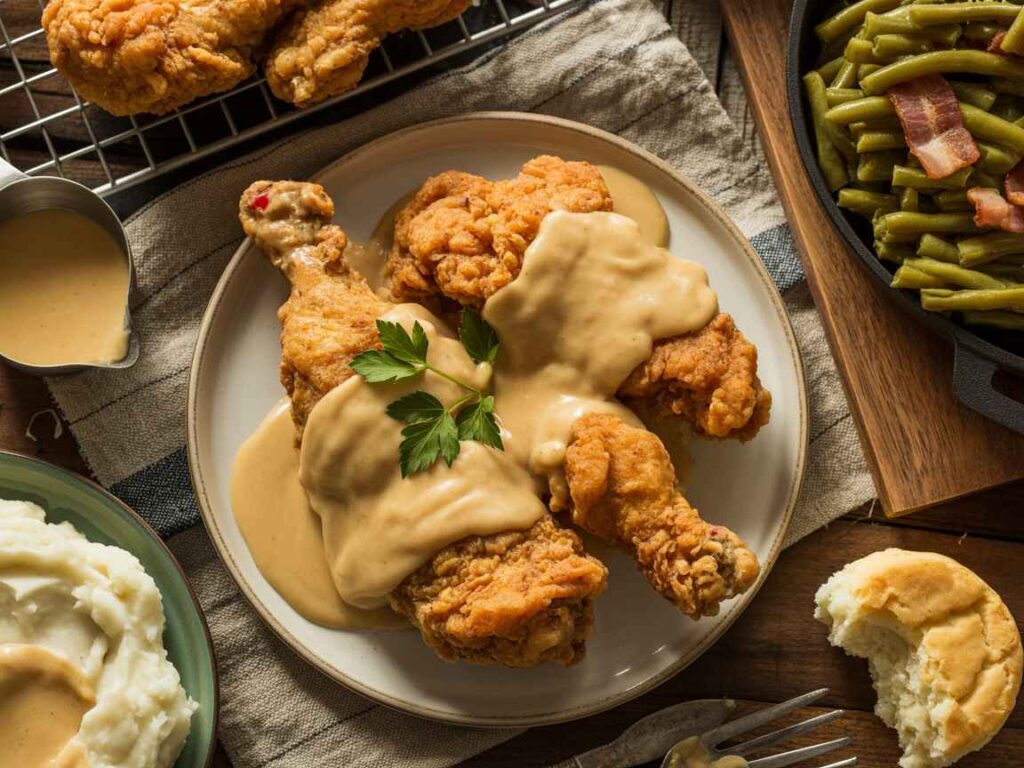
The Gravy: Where Magic Happens
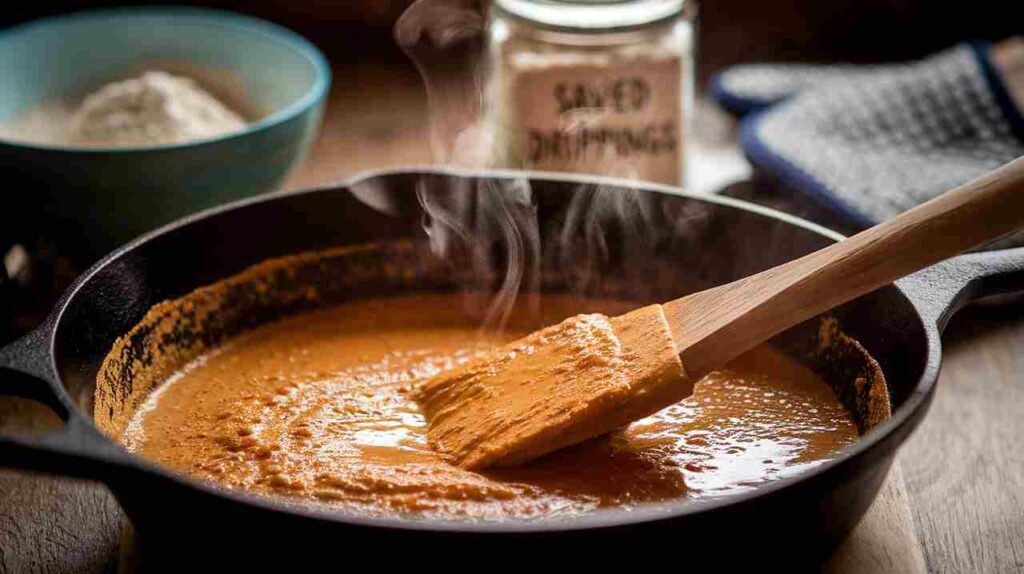
Starting with the Drippings
Ok, now it is time to divide the amateurs and the professionals. when you have fried that fine chicken, please do not waste those drippings. have you ever tried that crunchy golden stuff at the bottom of your pan? liquid gold, pal.
What you want is somewhere around 3- or 4-tablespoons of those drippings. When you do not have enough (which quite honestly should not be the case providing you have done everything properly), you can add butter. However, in all seriousness, in the case when you are running low in drippings, it is possible that you need to alter your frying method 🙂
The drippings should include:
- Crispy bits of seasoned flour
- Rendered fat from the chicken
- Concentrated flavor from the browning process
The Roux: Your Gravy’s Foundation
This is where we into nitty-gritty technical, but do not worry because this is not as hard as you might think. Roux is simply fat and flour which are cooked up together, and what makes your gravy that pure thickness with that great flavor.
The perfect roux ratio:
- 3 tablespoons fat (your precious drippings)
- 3 tablespoons flour (use the same seasoned flour from earlier)
Heat this mixture on a medium fire in such a way that it takes approximately 2-3 minutes to stir it. You have it so it could smell nutty and have a resemblance of peanut butter. When it begins to turn dark brown you have gone too far–begin again.
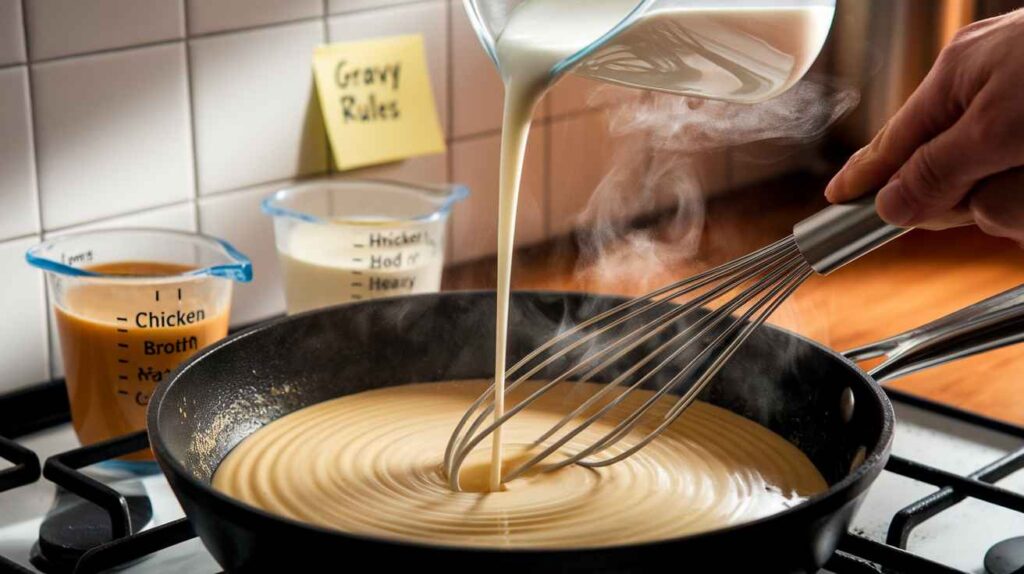
Liquid Addition: The Critical Moment
This is where being human causes most people to go absolutely crazy and screw everything over. Take up your liquid gradually, and when I say gradually I mean a thin stream, whisking till the life depends on it.
The liquid combination I swear by:
- 1 cup whole milk (none of that skim nonsense)
- 1 cup chicken broth (preferably homemade, but store-bought works)
- 1/2 cup heavy cream (for extra richness)
| Liquid Type | Purpose | Amount |
|---|---|---|
| Whole Milk | Base creaminess | 1 cup |
| Chicken Broth | Savory depth | 1 cup |
| Heavy Cream | Rich finish | 1/2 cup |
Put milk and then broth afterwards, then topping it with cream. Stir regularly to avoid lumps–you do not need lumpy gravy to ruin your excellent chicken.
Seasoning the Gravy: The Final Touch
Beyond the Basics
This is not salt and pepper that you will put into your gravy, but personality. Once you have your foundation even and frothing, now is when you would adjust those tastes.
Essential seasonings:
- Salt and white pepper (black pepper looks weird in gravy, fight me)
- Garlic powder just a pinch more
- Onion powder for depth
- A tiny bit of cayenne for warmth
- Fresh herbs if you’re feeling fancy
The Taste Test
This is what your grandma surely told you- taste as you go. This is not about dumping seasonings and wishing this or that times. A pinch, a taste, and then adjust, again.
The gravy is to be creamy, salty and a tad bit spicy. In case of the dish being tasteless, use more salt. When too thick add a little more broth. Too thin? Allow it to cook more.
Bringing It All Together
The Assembly Strategy
You have your chicken fried just right sitting on some kind of wire rack (please do not just put it on paper towels), and your gravy is silky and delicious. And here is the trial run.
The plating process:
- Warm your plates in a low oven
- Arrange the chicken pieces thoughtfully
- Ladle the gravy generously over and around
- Garnish with fresh herbs if you’re feeling fancy
Temperature Harmony
The whole thing has to be hot by the time it reaches the table. Hot chicken, but cold gravy and vice versa is simply pitiful.
Put the chicken to keep it nice and hot in the oven 200 F. and keep finishing the gravy. This also aids in keeping the coating crispy other than being soaked.
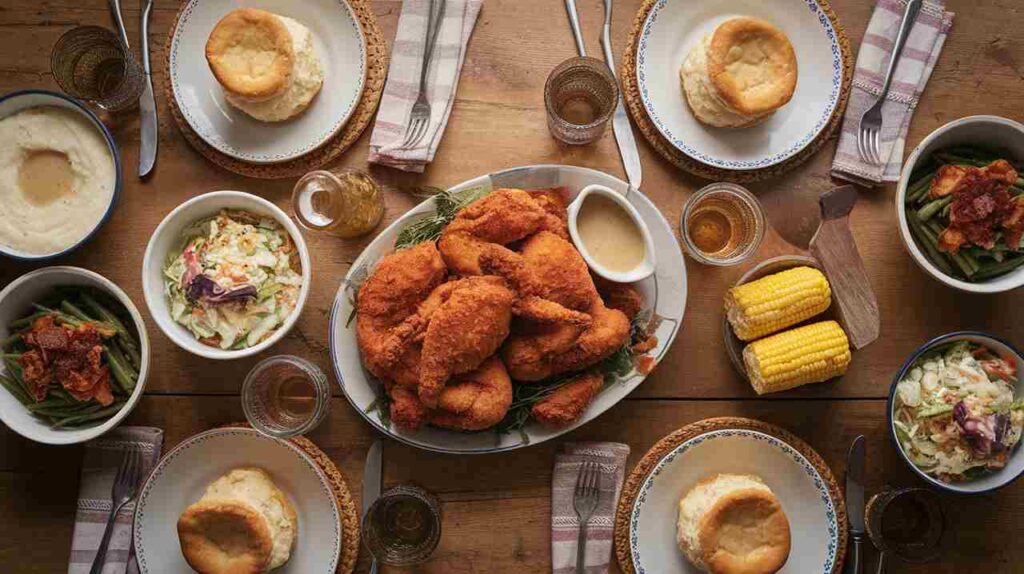
The Perfect Sides
Classic Companions
Chicken and gravy is delicious, I admit, but it is possible to find the perfect sides to create a dish, which will make people cry over it.
Traditional Southern sides:
- Mashed potatoes (obviously)
- Buttermilk biscuits for sopping up gravy
- Green beans cooked with bacon
- Corn on the cob when it’s in season
- Coleslaw for a fresh contrast
The Biscuit Debate
I know some of yall will get all worked up about this but store bought biscuits are okay when you are already making from scratch chicken and gravy. Perfect should not be the enemy of good, you know?
Said that, though, when you want to get serious, drop biscuits can be made more easily and also taste delightful with gravy, in place of rolled biscuits.
Pro Tips That Make All the Difference
The Resting Game
After frying, allow your chicken to stand a minimum of 5 minutes. This provides an opportunity to re-redistribute the juices, and maintains the coating crispy. I understand it to be agonizing to wait, but believe the process.
Gravy Consistency Secrets
The ideal gravy is supposed to cover the rear of a spoon and yet it is supposed to be pourable. As long as you can trace it with your finger and it remains stuck there you are golden.
Consistency troubleshooting:
- Too thick? Add warm broth gradually
- Too thin? Simmer longer or add a cornstarch slurry
- Lumpy? Strain it through a fine mesh sieve
Storage and Reheating
What a reality-check, sometimes you earn too much (though how is it possible to earn too much, to be honest)? Cooked chicken also goes wonderfully in a 350 degree oven about 10 minutes. The remaining gravy is warmed in a frying pan and a little milk poured in them.
Final Thoughts
The science of crafting chicken and gravy as a Southern grandma entails not following some recipe word-to-word but the appreciation of the motive behind each act. Once you learn the principles you can begin customizing so they become yours.
And mind you, even the best cooks in the South had to exercise do this stuff. Aim at the best, but do not despair because you do not get it at a first attempt. Your taste buds should be happier than having that frozen food in the grocer.
Go on now and go in that kitchen and start making some magic. And by the way, when folks begin to inquire after the secret of your recipe, just smile and nod and say you had a teacher who knew her stuff a Southern granny.
Happy cooking, y’all!
