
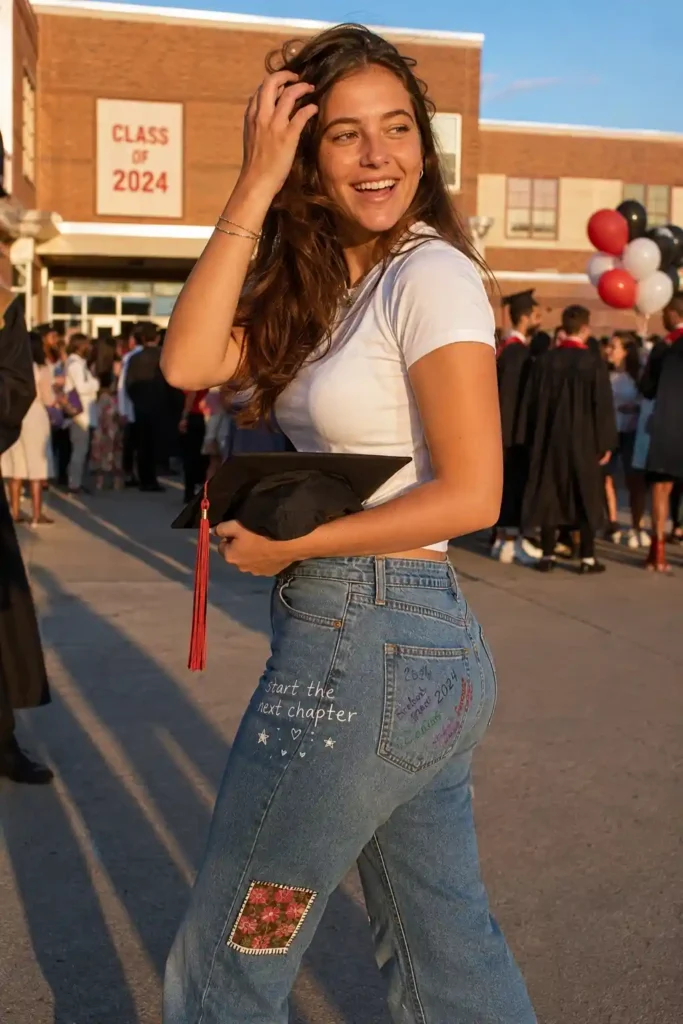
Your senior year is almost over, and somewhere in your closet sits the perfect blank canvas: a plain pair of jeans just waiting to become the loudest, proudest piece of clothing you own.
I made my own senior jeans back in high school with a puffy paint set and way too much confidence, and honestly? Still one of my favorite things I’ve ever worn.
Senior jeans have become a full-blown tradition, especially if you scroll Pinterest for more than five minutes during grad season.
Friends sign them. Coaches sign them. Sometimes even that one teacher who terrified you freshman year signs them.
By graduation day, you’re not wearing denim anymore. You’re wearing four years of your life.
So let’s get into 16 ideas that actually work, whether you’re a total beginner with a hot glue gun or someone who’s spent way too much money on a Cricut.
The Complete Guide To Senior Year Sweatshirts Styles Designs And Buying Tips
Check It Out →1. Go classic with signature jeans
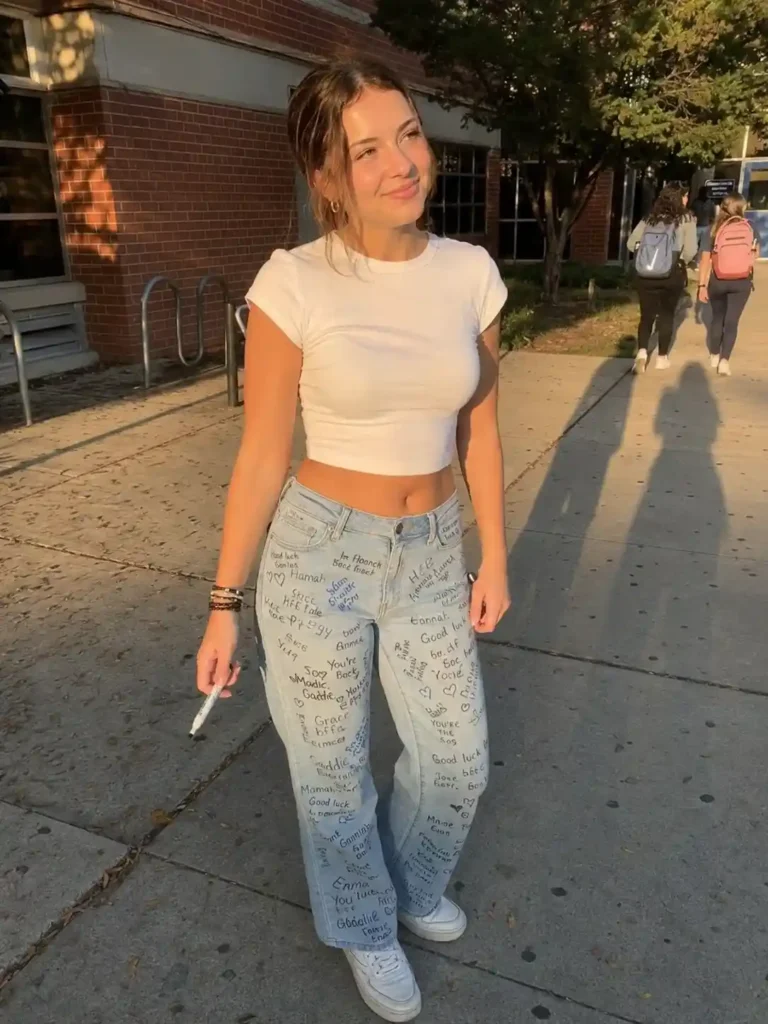
This is the OG senior jeans move, and there’s a reason it never goes out of style.
Grab a plain pair of light-wash jeans and a set of fine-tip fabric markers.
Ask your friends, teachers, coaches, and even that lunch lady who always gave you extra fries to sign a spot. By May, you’ll have a walking yearbook.
Pro tip: stick to permanent fabric markers, not regular Sharpies. Regular Sharpies fade fast in the wash, and nobody wants their bestie’s signature disappearing by prom.
2. Patch together your memories
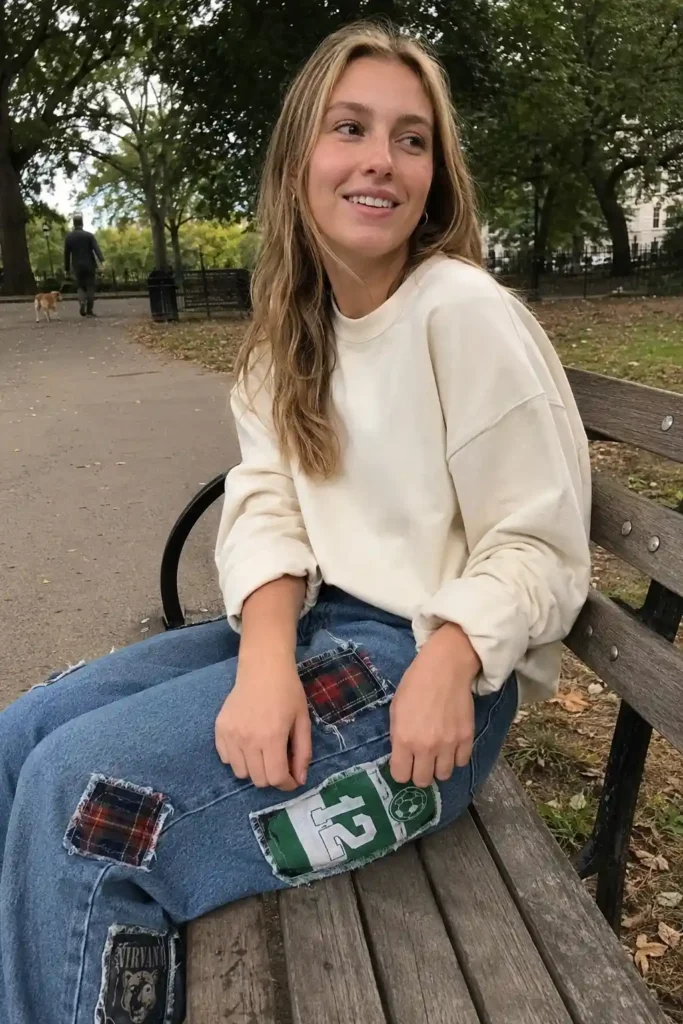
Old sports jersey? Band t-shirt from that one concert? Cut out small squares from clothes that mattered to you and sew or iron them onto your jeans as patches.
I did this with a piece of my old soccer jersey, and every time I look at those jeans, I remember exactly how it felt to score that one goal senior year (okay, my only goal senior year, but still).
Patchwork jeans work because they’re personal in a way store-bought denim never will be.
Ever noticed how the most complimented outfits are usually the ones with a story behind them?
3. Embroider your grad year
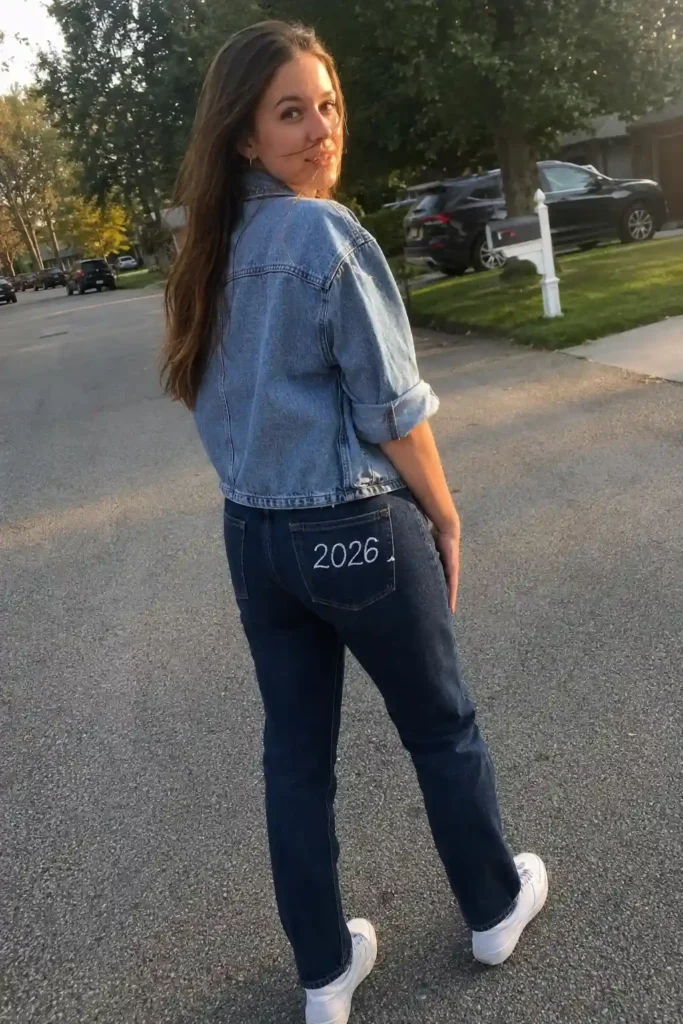
Hand embroidery has had a massive comeback, and for good reason.
A simple embroidered “2026” across a back pocket looks clean, intentional, and way more expensive than it actually is.
If you’ve never embroidered before, don’t panic.
A basic backstitch and a satin stitch will get you through most designs, and there are tons of beginner tutorials on Sew Mama Sew that break it down step by step.
4. Bleach splatter for that effortless grunge look
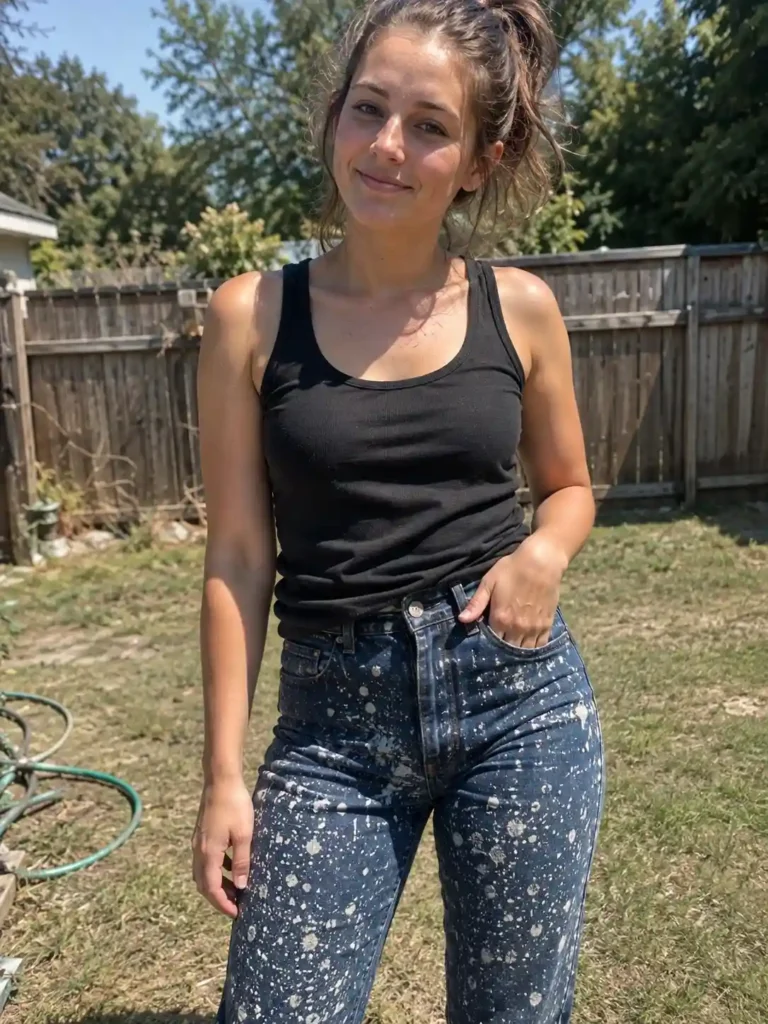
This one’s messy, chaotic, and kind of addictive once you start.
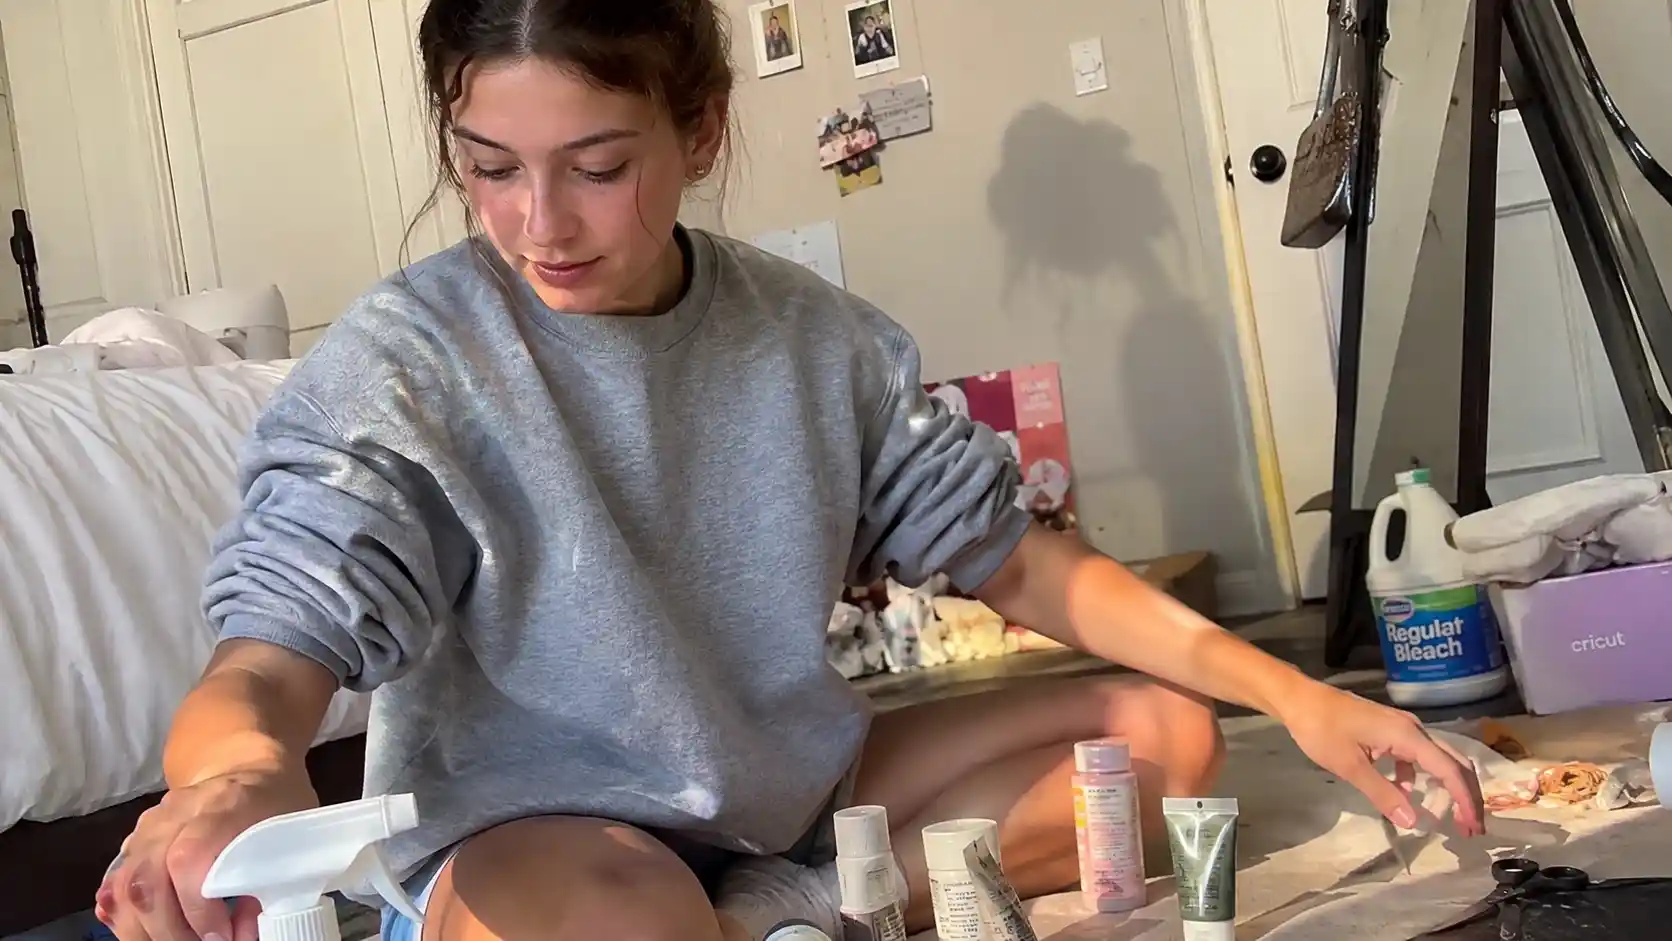
Mix bleach and water in a spray bottle (roughly one part bleach to two parts water works well), lay your jeans flat outside, and spritz away.
The lighter fabric underneath creates a speckled, sun-bleached effect that looks intentional even though you basically just flung chemicals at your pants.
Do this outside. Trust me on this one, IMO your mom’s laundry room is not the place for a bleach experiment.
5. Iron-on photo transfers
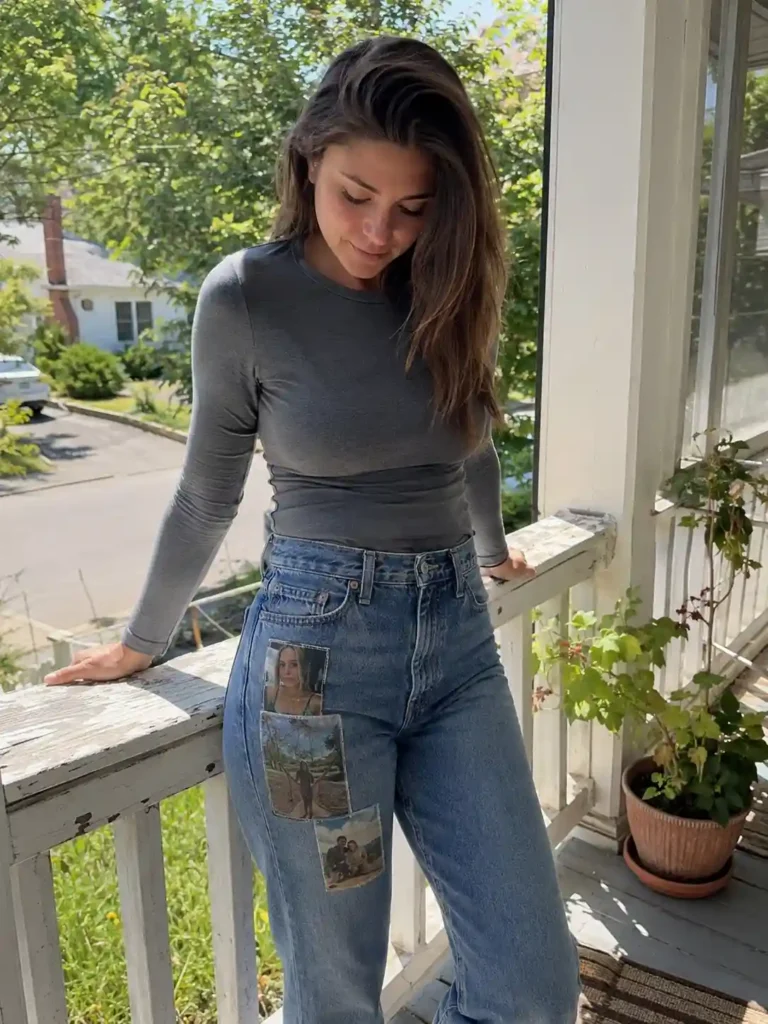
Print your favorite photos from senior year onto iron-on transfer paper and press them right onto your jeans.
Prom pics, football games, that questionable haircut phase; all of it can live on your denim forever.
Just make sure to mirror the image before printing, or your transfer will come out backward. Ask me how I know.
6. Paint a quote that actually means something
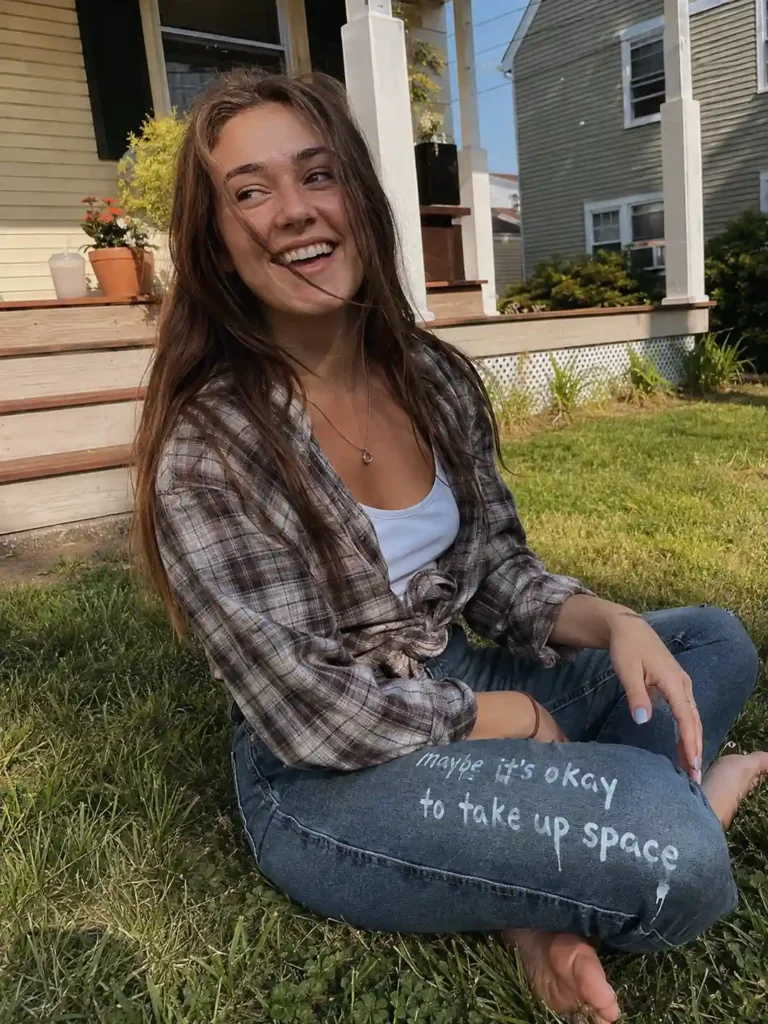
Skip the generic “Class of 2026” text everyone else is doing (unless that’s genuinely your vibe, no judgment).
Instead, paint a lyric, a quote, or an inside joke that only your friend group will understand.
Fabric paint pens work best for lettering because they give you way more control than a brush.
Michaels carries a solid range of fabric paint markers if you want something beginner-friendly.
7. Bedazzle your pockets
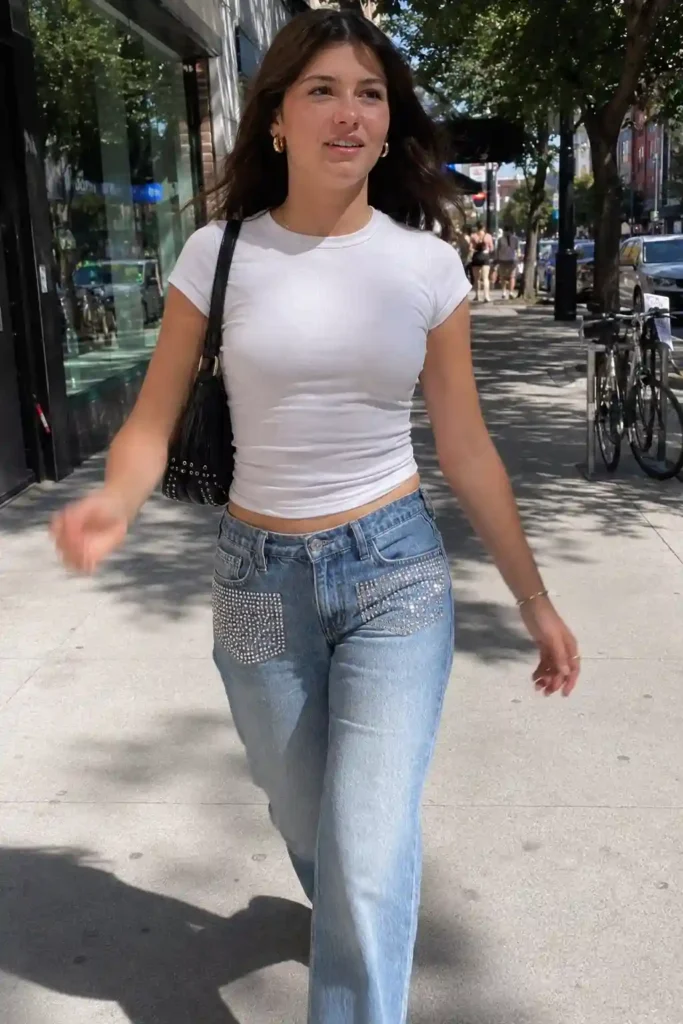
There’s something deeply satisfying about a pocket covered in rhinestones catching the light during your walk across the stage.
Use fabric glue and a rhinestone applicator tool for precision, or go the lazy route with iron-on crystal sheets. Both work. One just takes about three times longer.
8. Fringe the hems
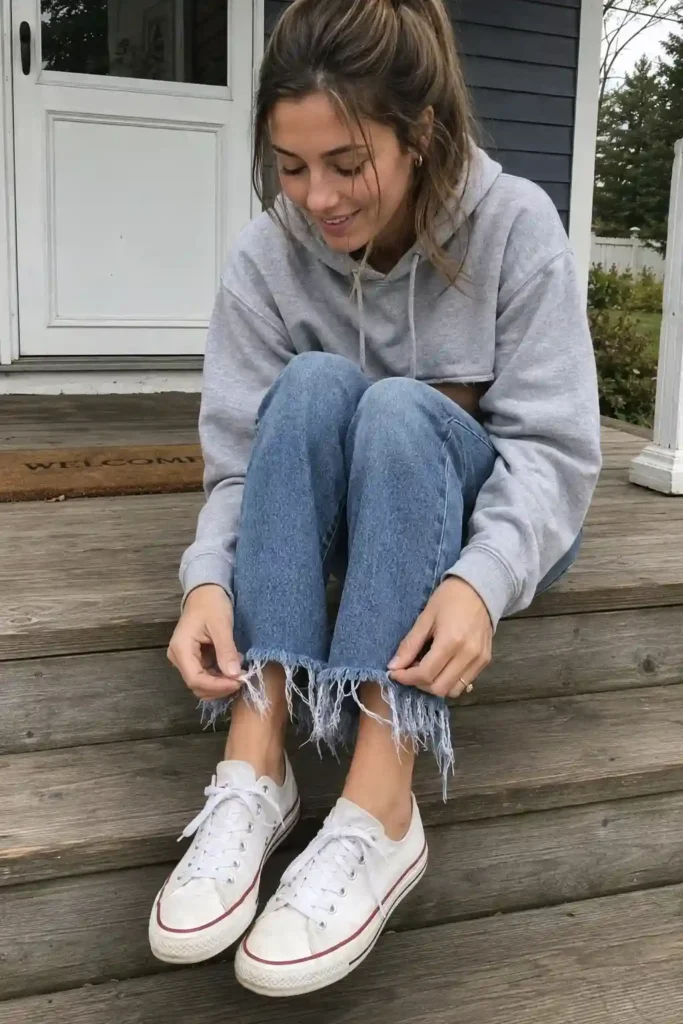
Cut a few inches off the bottom of each leg, then pull the horizontal threads out one by one to create a soft, frayed fringe.
It takes patience, but the DIY denim community swears by this technique for turning basic jeans into statement pieces, and Denim Blog has some solid visual references if you want to see the process before diving in.
Put on a show while you do this. It’s tedious work, and your fingers will thank you for the distraction.
9. Tie-dye the whole thing
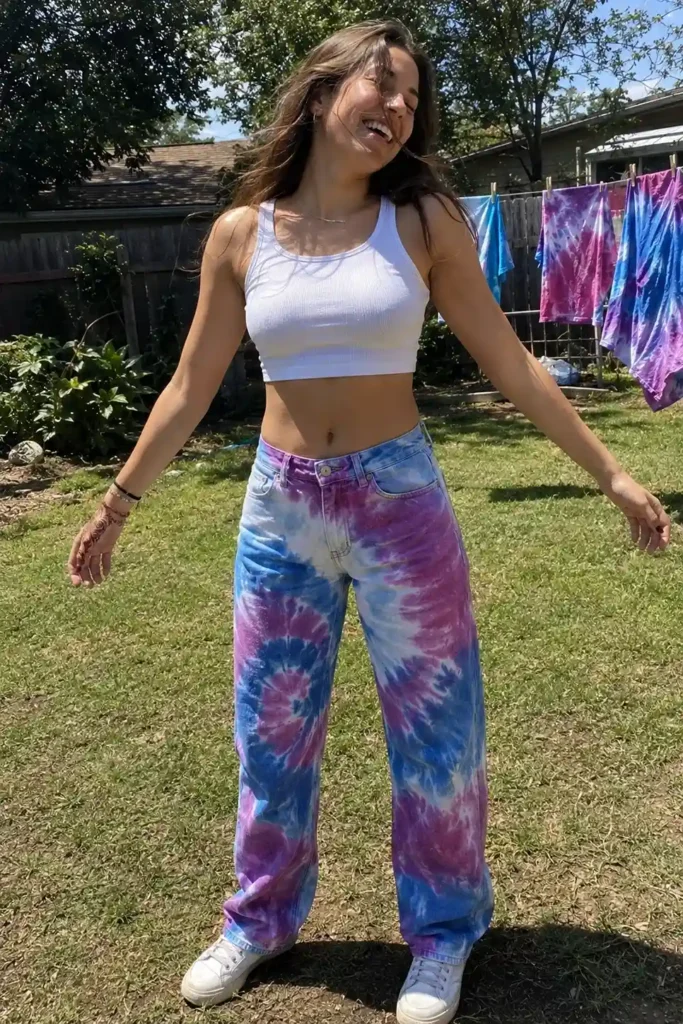
Not every senior jeans project needs to be subtle. Full tie-dye jeans are loud, colorful, and honestly kind of hilarious in the best way.
Soak your jeans in soda ash first (this helps the dye actually stick to denim, since it’s a tougher fabric than a cotton tee), then apply your dye however chaotic you want it to be.
Rainbow spiral, ombre fade, whatever speaks to you.
10. Add enamel pin collages
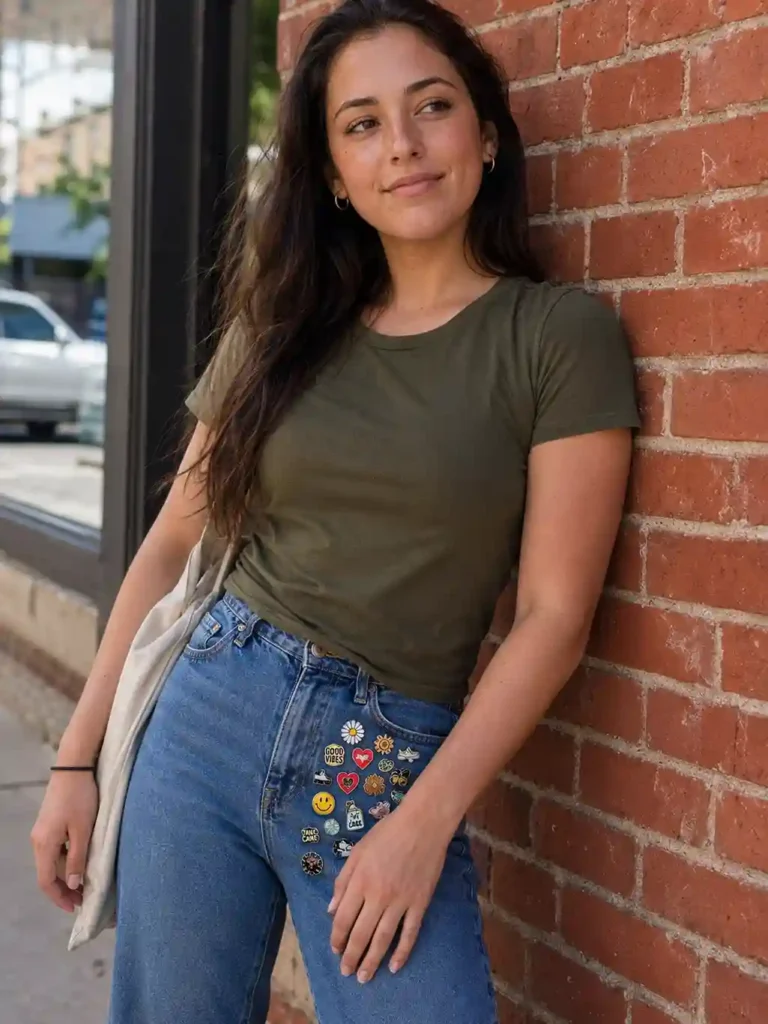
If you’ve been collecting enamel pins for years and have nowhere left to put them, your jeans just became prime real estate.
Cluster pins from clubs, sports, concerts, or random inside jokes across one pocket or thigh.
This idea works especially well if you’re someone who’s more into pinning things than sewing them, since there’s zero stitching involved.
11. Try sashiko-style stitching
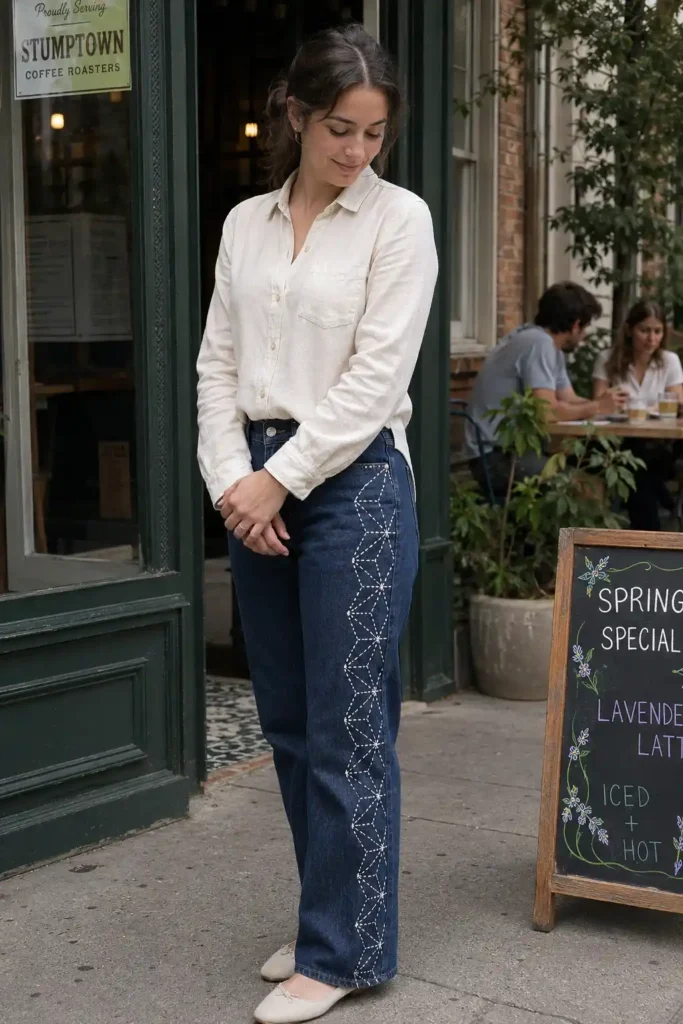
Sashiko is a traditional Japanese embroidery technique that uses simple running stitches to create geometric patterns, and it looks incredible on denim.
White thread against dark denim gives off a crisp, almost professional finish.
It takes longer than most ideas on this list. But if you’ve got patience and a few quiet weekends before graduation, this one’s worth it.
12. Cut and layer lace under distressed knees
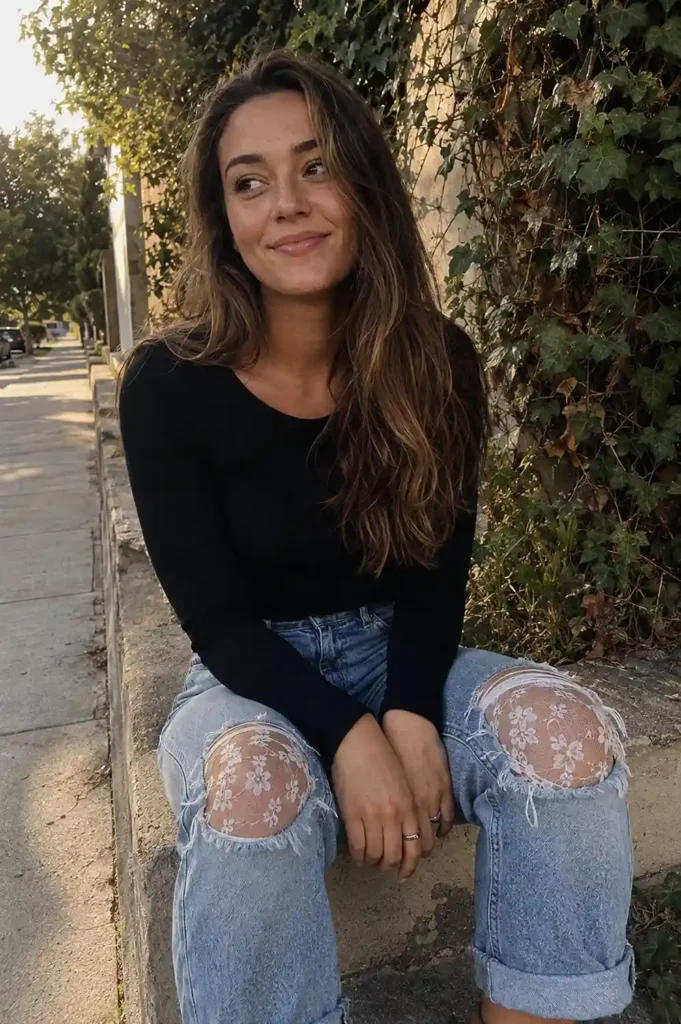
Distress your knees the usual way (scissors, a cheese grater, whatever tool you trust), then sew a piece of lace fabric underneath the holes so it peeks through.
This mixes edgy and delicate in a way that photographs beautifully, which matters more than you’d think once graduation photo season hits.
13. Letter patches spelling something bold
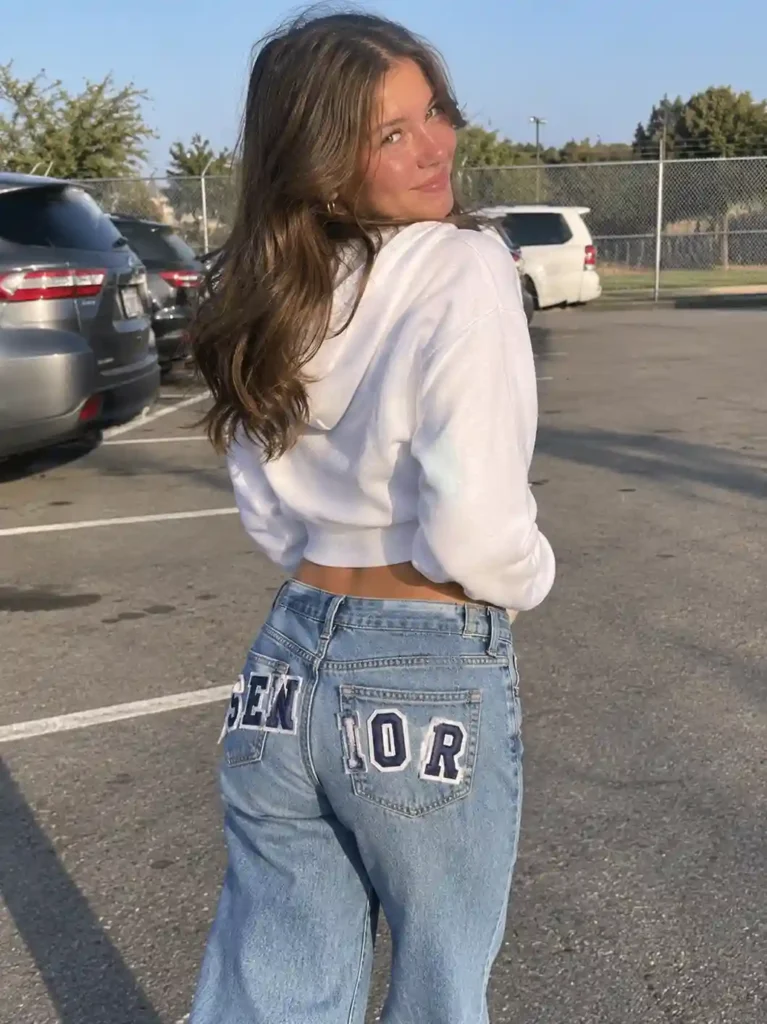
Iron-on letter patches spelling “SENIOR,” your school mascot, or your grad year across the back pockets make an instant statement piece.
No sewing skills required, which makes this one of the easiest ideas on this entire list.
14. Color-block panel inserts
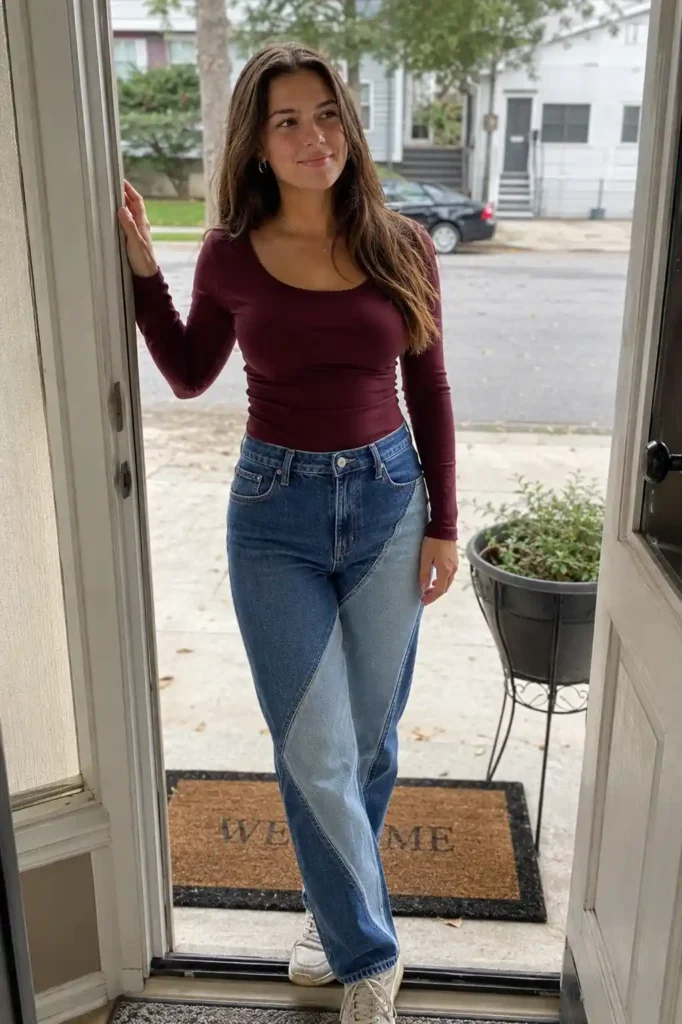
Cut a few horizontal or diagonal panels out of your jeans and replace them with contrasting fabric.
Denim-on-denim in two different washes looks especially good, though a pop of color works too if you’re feeling bold.
This one takes more sewing know-how than most other ideas here.
If you’re newer to garment construction, a quick refresher from a resource like The Spruce Crafts can save you a few frustrated seam-ripping sessions.
15. Chain and hardware details
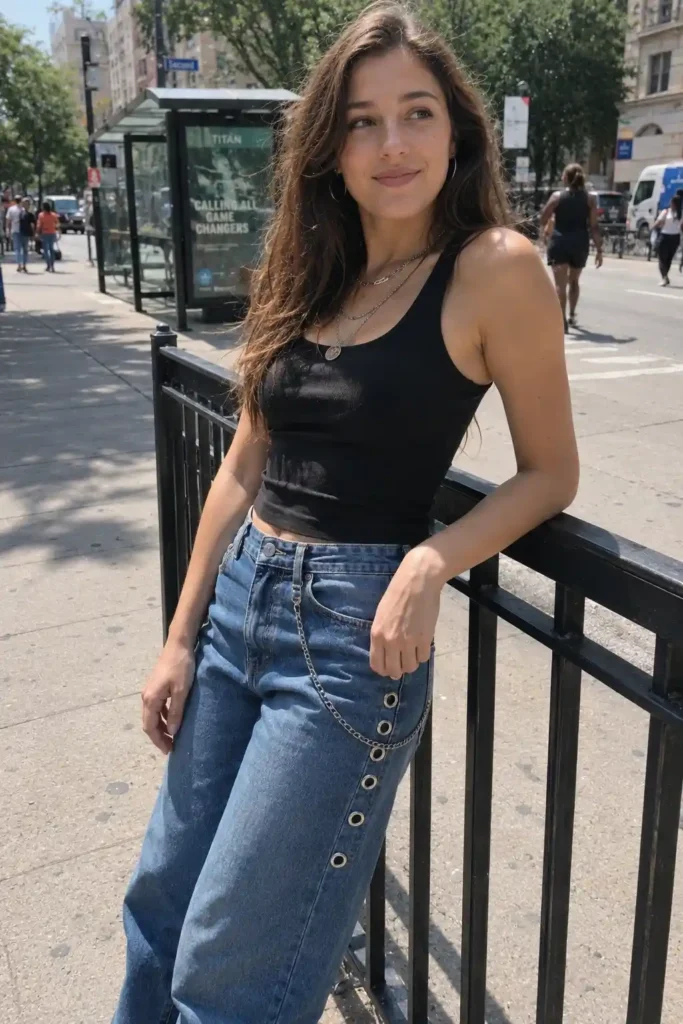
Attach small chains, safety pins, or metal grommets along the seams or pockets for a punk-inspired edge.
This is one of my personal favorite categories because it photographs incredibly well and takes almost no sewing skill, just a few strategically placed jump rings and pliers.
16. Make a matching jean jacket
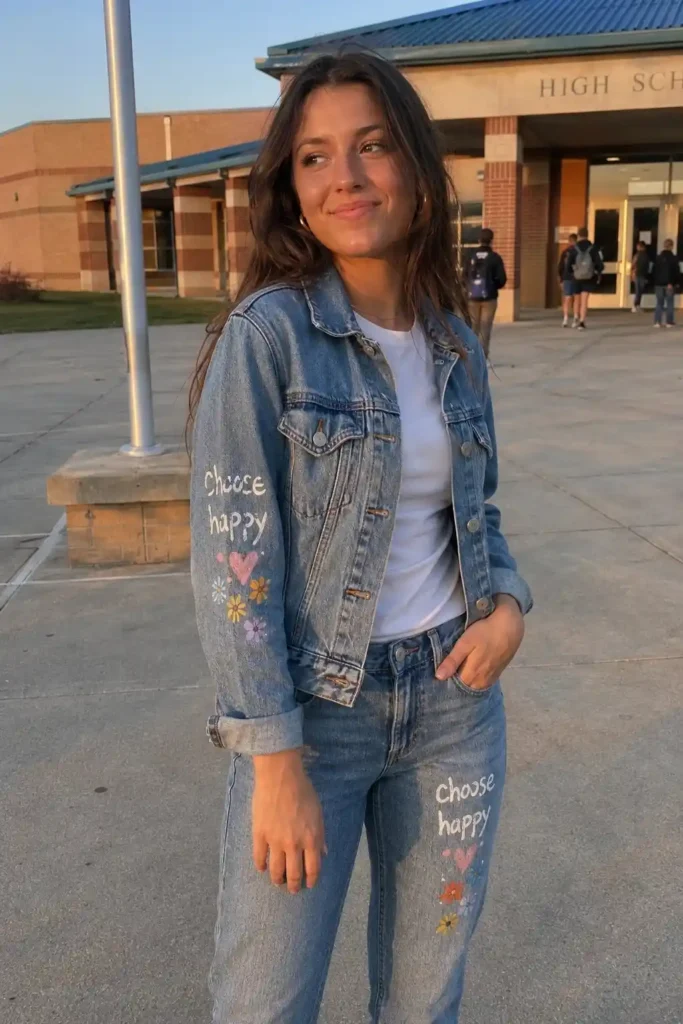
Once your jeans are finished, why stop there? A companion denim jacket with a smaller, coordinated version of your design ties the whole look together for graduation day photos.
This isn’t necessary by any means. But if you’re the type who likes a full outfit moment (no shame, we’ve all been there), this idea takes your senior jeans from “cool pants” to “actual signature look.”
Here’s a quick side-by-side if you’re trying to decide where to start:
| Idea | Skill Level | Time Needed |
|---|---|---|
| Signature jeans | Beginner | 1 day (plus friend availability) |
| Embroidered grad year | Intermediate | A few evenings |
| Sashiko stitching | Advanced | Several weekends |
| Bedazzled pockets | Beginner | A few hours |
A few things I wish someone had told me first
Wash and dry your jeans once before you start any project. Fresh-from-the-store denim shrinks a little, and you don’t want your finished masterpiece coming out uneven after its first wash.
Also, test any paint, dye, or bleach on a scrap piece of denim first. This sounds obvious, and yet I skipped this step exactly once and ended up with a weirdly orange patch on my left knee that I had to cover with, you guessed it, an enamel pin.
One more thing, slightly off-topic but worth saying: don’t rush this project just because everyone else’s jeans seem further along.
Some of the best senior jeans I’ve seen took an entire semester to finish, collecting signatures and patches slowly instead of all at once.
There’s no deadline here except graduation itself, and even that’s flexible if your school lets you wear them to grad parties instead.
Frequently asked questions
Do senior jeans have to be blue denim? Not at all. Black denim, white denim, and even colored denim all work as a base. Lighter washes just tend to show fabric markers and paint more clearly, which is why they’re the most popular choice.
What’s the best way to keep signatures from fading in the wash? Use permanent fabric markers rather than regular ones, let the ink cure for at least 24 hours, and wash the jeans inside out on a cold, gentle cycle. Skip the dryer if you can and let them air dry instead.
Can I combine multiple ideas on one pair of jeans? Absolutely, and honestly, most of the best senior jeans I’ve seen mix at least three or four techniques from this list. Start with one focal idea (like embroidery or patches), then build outward from there so the design doesn’t feel cluttered.
This is genuinely one of the most fun projects you’ll do all senior year. Wow, and it’s one of the few school traditions you actually get to keep wearing long after graduation ends. So which idea are you starting with first, and who’s getting the first signature?
